Frequently Asked Questions
Got questions about making your our craft beer at home? Here are some answers...
Our Kit- What’s in the kit?
- What do I need to provide?
- How much beer does a kit make?
- How much alcohol is in the beer the kit makes?
- How long will the beer keep once I’ve made it?
- How should I store my kit if Im not brewing immediately?
- Do you sell a Lager kit?
- Is it legal to brew my own beer?
- Is it safe to brew my own beer (wont it make me blind)?
- Isn’t making beer difficult?
- Can I brew more than one kit at the same time?
- How long does it take to brew my own beer?
- Should there be sediment in the bottom of my bottles?
- How do I choose water for my brew?
- What bottles should I bottle my beer in?
- How long can I leave my beer in the fermentor?
- The beer I made seems very dark
- Help! I don't see bubbles in my airlock!
Our Kit
What’s in the kit?
It contains everything you need to make a batch of all-grain craft beer from scratch with what you already have in your kitchen. The exact ingredients differ depending on which style of beer you're interested in. We have separate page detailing each of our 'Pail' Ale, 'Lockdown IPA, and 'Coffee Stout' .
What do I need to provide?
Water, some empty (soda) bottles and a handful of things you probably already have in your kitchen. You can find a full list at the top of our recipe.
How much beer does a kit make?
You should end up with four litres in bottles. Maybe a fraction less and possibly a little more depending on your technique. This is why we advertise it as “7 to 8 Pints”.
How much alcohol is in the beer the kit makes?
This depends on how well you follow the recipe, but for the 'Pail' Ale you should get about 5.2% ABV. The highest we’ve gotten in our test batches (focusing on extracting as much sugar as possible to the detriment of other characteristics) was approximately 5.8% ABV. The lowest we’ve gotten (in a batch where we purposely did things wrong) was about 4.4% ABV.
Given the intended characteristics of the styles, the 'Lockdown' IPA and 'Coffee Stout kits will produce slightly more alcohol while the 'Water Biscuit' SMaSH will produce a little less. This difference will be at most around 0.5% ABV.
How long will the beer keep once I’ve made it?
Your kitchen isn’t a certified food facility with a controlled process so no guarantees, but all the beers we’ve made ourselves keep at least 6 months if stored in a cool dark place (light breaks down the compounds in beer - this is why so many beers are sold in brown bottles). The beer can be drunk 6-7 days after bottling and is best 4 weeks after bottling.
How should I store my kit if Im not brewing immediately?
We freshly mill all our grain to help ensure you can make the best possible beer. The sooner you brew your kit, the better your beer will turn out. We understand that life can get in the way sometimes though, so here is our advice.
If you can, we recommend that you remove the bags of yeast and hops and store these in your fridge. Be sure not to freeze the yeast though. The idea is to keep the yeast dormant and to slow down the breakdown of all the complex molecules in the hops.
Then store the rest of the kit sealed in a cool place that is out of direct sunlight. This should help preserve the enzymes in the malted barley for your brew day.
Do you sell a Lager kit?
Ah yes, the crisp clean taste of the most successful style of commercially produced beer. You're not alone in asking for the style that was all our our first! No we don't - and there is a good reason.
We're a small family-run passion project aiming to get more people making their own beer by showing that brewing doesnt have to be complicated or expensive. Making a good lager, however, is challenging - particularly in the warm South African climate.
If we ignore a number of advanced (but achievable) brewing techniques used in the commercial lager you love (including yeast starters, wort chillers, 'diacetyl rest' and precipitating proteins), the biggest challenge to making a good lager at home is temperature control.
Lagers are made with a special bottom-fermenting lager yeast that requires a long fermentation at precisely-controlled low temperatures. Depending on the specific yeast, you typically need to keep your fermentor below 13C (but above around 3C so that the yeast doesnt go dormant) for weeks with as little temperature fluctuation as possible. While homebrewers can certainly achieve this at home in some European basements, in South Africa it typically involves retrofitting a dedicated freezer with some sort of temperature control to get it operating slightly above its designed temperatures. Alternatively, you could maintain a water bath for the fermentor that you add ice to once or twice a day for weeks. That is most certainly a labour of love that can be an interesting challenge for more experienced brewers.
If you mess up your temperature control or skip all the 'advanced' techniques, you are going to mistakenly introduce flavours that are intentional in ales. So while we do encourage anyone who is taking their homebrewing seriously to eventually attempt a lager, we aim to help you make a good ale rather than an 'okay' lager.
If you are new to making your own beer and asked about lager because you haven't liked the fuller, more robust flavours in some of the craft beers you've tried previously, read on.
- That can be a good mindset. Craft beer should be about finding (or making) the beer you want to drink!
- You should check out our 'Water Biscuit' SMaSH kit.
Brewing
Is it legal to brew my own beer?
Yes, you can brew at home for personal consumption. Brewing is actually an important part of South African heritage. You may not, however, sell the beer you brew - that needs licenses.
Is it safe to brew my own beer (wont it make me blind)?
As long as you follow the guidelines in our recipe, and don't contaminate your beer, you’ll be fine. People have been brewing their own beer for thousands of years and they’ve been fine. They also didnt have the benefits of your clean kitchen, the knowledge you’ll get from us, and precisely produced ingredients.
As an added safety, beer that has been contaminated with outside microbes smells terrible when it comes out the fermentor. Like super chunder-in-a-bush kak! So if your beer comes out smelling and tasting like beer - you’re good.
“But what about blindness”?
That concern comes from distilling your own alcohol (moonshine and similar) and not from brewing beer.
All fermentation creates small amounts of a compound called methanol, which in higher concentrations is
incredibly toxic. The danger with distilling is that it can concentrate methanol to these dangerous
concentrations if not done correctly. Without distillation, brewers' yeast dies before it can produce
dangerous concentrations of methanol.
The beer that you’ll make with our kit will contain a trace amount of methanol, just like beer and wine you buy in the store. Like store-bought beer, the methanol will be at such a low concentration that it is safe to consume. Our kit includes a specially engineered brewer’s yeast that exhibits low methanol production.
Isn’t making beer difficult?
Nope. It is a little time-consuming though.
Like many things in life, brewing is very much an 80/20 pursuit. With a minimum (20%) of effort you can reliably make delicious beer. On the other hand, if you are in a microbrewery trying to make thousands of litres with a consistent taste that represents your brand, you have to put in 4 or more times more effort to get that consistency.
As a hobby, this means that homebrewing is easy to get into while allowing a great deal of things to pursue if they interest you. This is why you may have that friend-of-a-friend with so much brewing stuff, but we can sell you a kit you can easily make in your kitchen.
Have a look at our recipe and see for yourself. We have designed a method for you to be able to make your beer as easily as possible, while still authentically brewing your own all-grain beer from scratch (rather than buying some concentrate).
Hopefully this is the start of a rewarding hobby for you, so while the steps are simply explained, we do attempt to introduce brewing jargon to help jump you into the world of craft brewing. Don’t be alarmed - you'll catch on quick
Can I brew more than one kit at the same time?
Yes! That is a great idea! It takes roughly the same amount of time to brew multiple batches in the same pot as it takes to brew one. You just need to ensure that you have a pot that is large enough.
This would probably be a good time to mention that we offer free shipping on orders of 4 or more kits...
How long does it take to brew my own beer?
Minimum 10 days.
You need 3-4 hours on the first ‘Brew Day’ and about one hour a week later on ‘Bottling Day’. Your beer spends 4 to 7 days between Brew Day and Bottling Day fermenting in its fermentor and it spends 6 to 7 days in bottles, after Bottling Day, naturally carbonating and conditioning. You can happily drink it at this point, but if you have the patience, it can benefit from up to 4 weeks of conditioning in bottles.
Should there be sediment in the bottom of my bottles?
Yup - that’s normal for homebrewing (and a number of craft beer styles). Many brewers even go as far as swirling the last bit of beer in the bottle to pour this sediment into their glass to get the rich flavour of the sediment. It’s a matter of taste so give it a try on your first bottle. We particularly recommend this if you try the chocolate variation of our 'Coffee' Stout!
How do I choose water for my brew?

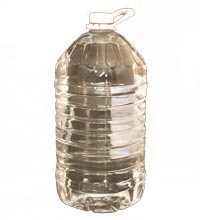
For your first brew, we strongly recommend that you purchase still/spring water from the store in order to give your beer the best chance possible and to have a consistent baseline that matches how we designed the recipe.
There are three concerns that are solved by still water for your first batch: 1) not contaminating your beer, 2) PH and mineral content, and 3) chloride content.
If you’re interested in taking a deeper dive into water chemistry (and saving some money), here is a primer to get you started, but ignore this and use store-bought water if it doesn’t interest you.
Contaminating your beer is only really a concern for the chilled water you add to the fermentor at the end of the brew (as the water prior to this is boiled in the brewing process). If not using store bought water that is already sterile, we suggest that you boil this water ahead of time before putting it in the fridge to ensure that it is sterile. Also sterilize the container you put it in using the no-rinse sanitizer (after correctly diluting it).
You want some mineral content in your water to aid in the brewing chemistry and yeast growth. For this reason, do not use distilled water.
Water that is particularly ‘hard’, such as from some South African boreholes, can change your beer’s maltiness, among other things, but this is typically preferable to overly softened water which tends to be more alkaline and thus not good for brewing.
Finally, much of South Africa’s drinking water has a higher amount of dissolved chloride as a result of the water treatment process. While this can enhance the fullness and malt sweetness or your beer, we’ve found that it inhibits the yeast. If you have access to a water filter (such as one with Activated Carbon) we suggest that you use that in order to lower the chloride.

What bottles should I bottle my beer in?
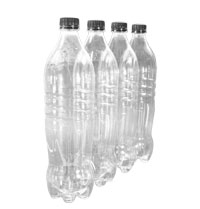
We suggest that you re-use empty 1-litre soda bottles.
Whatever bottle you use should seal well in order for your beer to naturally carbonate in the bottle. Soda bottles work well as they are specifically designed to hold in CO2.
We also suggest that you prefer smaller bottles over larger ones so that a bottle can be finished in a single sitting. When pouring out of a bottle, the beer is replaced with air that can cause the remaining beer in the bottle to turn stale if the bottle is re-capped and left.
How long can I leave my beer in the fermentor?
Under ideal conditions, fermentation should be complete after 4 days. Our recipe allows for 7 days of fermentation to account for variations.
If fermentation is not not complete by the time you bottle, it will result in over-carbonation in the bottles which typically results in a sad fizzy mess - usually on the hard-to-clean parts of the ceiling… ;)
If for some reason, you are unable to bottle after a week, it should be fine to leave the beer in the fermentor for up to a total of 3 weeks, provided it is stored in place with low temperature fluctuation as per our recipe.
After three weeks, your beer will still be very drinkable (and you should still bottle anyway). Depending on how stressed the yeast was, it can start to die and crack open releasing an after taste like ‘marmite’, but this doesnt even happen in all cases.
The beer I made seems very dark
Don’t worry. A slightly darker orange beer from our 'Pail' Ale kit is a result of the volume of water getting low during the boiling step (See the “Too little water in your pot?” block of our recipe). This should have little effect on the taste of your beer outside of slightly lowering the bitterness and aroma from the hops - which some people prefer. This deep orange also creates a more awesome looking beer better for showing off to your friends!
The 'Lockdown' IPA additionally gets a red colour from its caramel malt and the 'Coffee' Stout is... 'stout coloured'.
Help! I don't see bubbles in my airlock!
Ah yes, the universal anxiety of all homebrewers: is my beer actually fermenting after all that effort?!
The good news is that your beer is probably fine. Beer 'wants' to be made. Here is a list of advice to help with your concern:
- DONT open your fermentor until you are ready to bottle. We know that it is super tempting, but the brewer's yeast only makes alcohol in the absence of oxygen so you'll probably do more harm than good.
- First make sure that the lid of you fermentor is on securely and that there is a good seal where the tube enters the lid. If the CO2 is getting out somewhere that isn't the airlock, then oxygen can get in.
- The bulk of the bubbling happens over a 12 hour period in most cases. This starts sometime towards the end of the the day after you brew. In some cases its less time, and in other cases there is vigorous bubbling for a whole day. There is a good chance that you just missed it. After the this period of vigorous bubbling, the airlock will produce a couple of bubbles an hour so you'll probably still miss it. There is a simple trick you can use though...
- Press on the lid of your fermentor to force some of the pressure out through the airlock tube. Did you see bubbles? That's good! Come back in a couple of hours and do the same thing again. If you see bubbles again, it shows that pressure has been slowly replaced in the fermentor by healthy happy yeast. Everything is fine
- How long has it been since you put your beer in the fermentor? Your kit contains a relatively strong brewer's yeast that will probably be done within 4 days. We simply suggest 7 days in our recipe as a safety net in case the fermentation is slowed by something unexpected (like cold weather). If you are reading this after day 4, its probably fine if the fermentor isn't producing pressure anymore.
- As a last check, just before you bottle, take a sanitized spoon and taste your beer. If it doesnt taste sweet, then it means that all the sugar has been converted into alcohol by your yeast and you're good to go. Be sure to sanitize the spoon again before it touches the beer again. You may laugh as this reminder but it has happened :)
If none of this advice satisfies you, do not be concerned - it means that you are human. If you google the problem you will find lots of company, and even more advice! Just remember the first piece of advice: beer wants to be made.
Shipping
Which colour dot goes with which kit?
If you order multiple kits or refills from us in the same order, we label them each with a round colour sticker that corresponds to the primary hops in each style of beer. Here is a breakdown of which colour corresponds to which style:
- Yellow - 'Pail' Ale
- Blue - 'Water Biscuit' SMaSH
- Green - 'Lockdown' IPA
- Purple - 'Coffee' Stout
Your courier tracking emails will also have this information.

